Grants
A Grant provides access to specific data objects in one or more data sources.
The what-links also define the permissions that the Grant provides to the users.
When defining the who-links, you have the option to immediately grant the access or to pre-approve the access, which mean that the access will automatically be granted when the user creates an Access Request for this Grant Access Control.

The category of the Grant will determine which options are available to configure the Grant.
Permissions
When adding a Data Object in the what-list of a Grant, you also have to specify which permissions you want to Grant on this Data Object.
The available permissions are determined by the type of Data Object and the Data Source that the Data Object is in. For example: on a Snowflake table, permissions like SELECT, INSERT, … will be available.
Data Objects on a higher level will also show the permissions that are available on all its descendants. For example: on a Snowflake schema, you will also see the SELECT permission, which means that the SELECT permission will be applied on all tables and views in that schema.
On top of these, 3 additional permissions are always available to provide a high-level abstraction on top of the Data Source specific permissions: Read, Write and Admin.
These global permissions will be unpacked to Data Source specific permissions when the Access Control is synced to the Data Source.
For example: on a Snowflake table, the Read permission will translate into the SELECT permission, while the Write permission is unpacked to the INSERT, UPDATE, DELETE and TRUNCATE permissions. This mapping is determined by the CLI connector plugin.
Creating a Grant
To create a new Grant, navigate to Access > Grants and pick one of the Grant Categories. There, click the Create button in the top right corner of the page
ℹ️ To create a new Grant, you need be at least owner of one or more Data Objects or have the global
Access ManagerorAccess Creatorrole in Raito. See User Management for more information on roles in Raito.
A wizard will be shown to guide you through the different steps to create a new Grant.
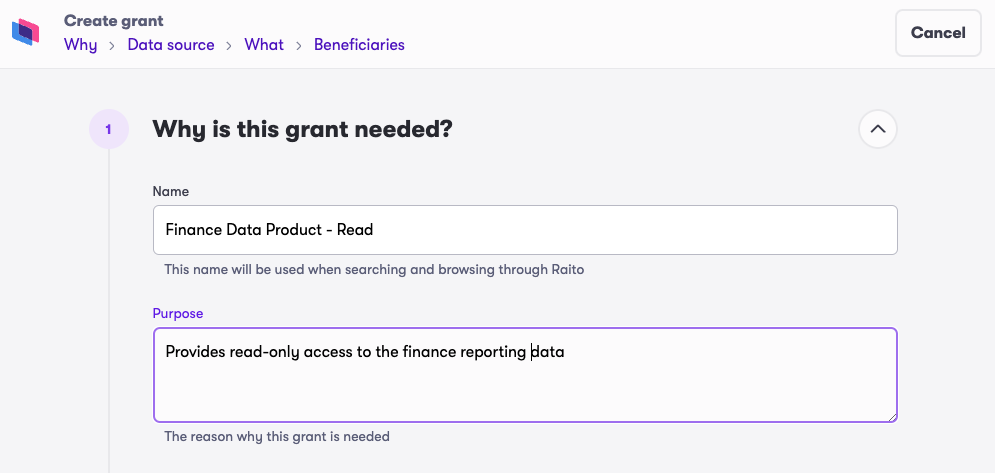
- In the first step, a name for the Grant must be provided.
For Data Sources where Grants are represented by named entities (e.g. roles), this display name will be used to generate that (technical) name from.
Additionally, an optional description of the Grant can be provided in this step as well. It is recommended to do this to make clear what this Grant is for.
- In step 2, you specify what this Grant provides access to.
To get started, click the
Addbutton in theAccess granted onsection.
- If this is the first element you add and the Grant Category you picked is a single Data Source category, you’ll be asked to pick your Data Source first. Pick one and click
Continue. - If this is the first element you add, you have to choose between defining a Static list or defining a Dynamic rule to calculate the items based on attributes. For more information see Attribute-Based Access Controls.
For now, pickStatic listand clickContinue. - Next, you pick what you want to provide access to. This can be Data Objects (e.g. tables, schemas, files, folders … ) or other Grants (to set up inheritance). You can also add Masks and Filters that should apply to your Grant.
Let’s just chooseData Objectsnow and clickContinue.
- Now you can easily select the Data Objects you want to provide access to. Use the search bar on top to search and filter for what you need, select the Data Objects you want and click
Add.
- By default, the objects are added with ‘Read’ access. You can easily update the permissions you would like to provide.
Note: If you are not the owner of the Data Objects or Grants you would like to add, an Access Request will be started and assigned to the owners to add these to your Grant. These items will be indicated with a question mark icon next to them.
Below the list of selected Data Objects, you will automatically get a list of the Data Sources that this Grant will be deployed to. You can select a different type of access per Data Source, if needed.
- If this is the first element you add and the Grant Category you picked is a single Data Source category, you’ll be asked to pick your Data Source first. Pick one and click
- In the last step, you can select who you want to provide this access to.

- Click the
Addlink. - Also here, you have to choose between defining a Static list or defining a Dynamic rule to calculate the items based on attributes when you add the first item. For more information, see Attribute-Based Access Controls. For now, pick
Static listand clickContinue. - Next, you’ll need to choose the type of beneficiary you want to add. This can be Users, Groups or other Grants (to set up inheritance). For this example, select
Usersand clickContinue.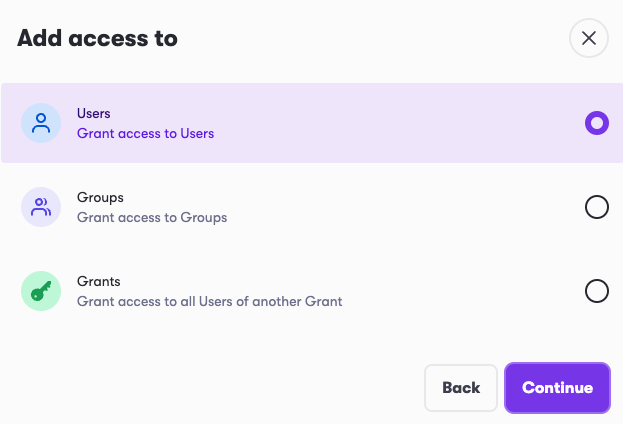
- Now you can search for the users you want to add and click
Add.
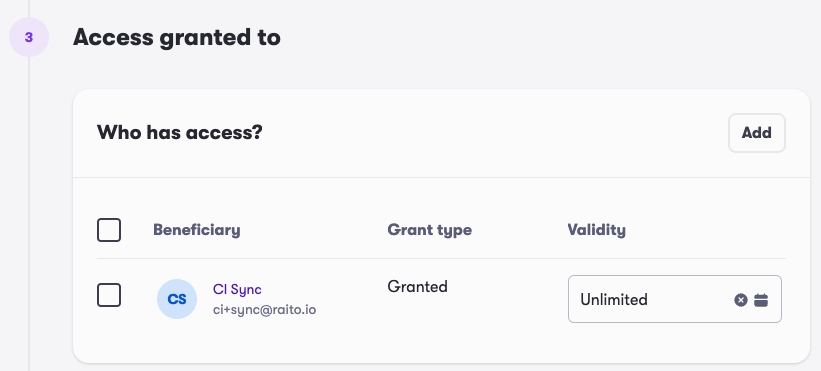
- Next, when adding users and groups, you can choose to either immediately
Grantthe access or to only pre-approve the access (On request). This means that the user (or users in the group) will automatically get access when they create an access request for this Grant. In this case, you can choose for how long they receive the access. After that time, it automatically gets removed again. For this example, just chooseGrantedand clickContinue. - Once the user is added to the list, you can still choose until when they user should get this access. At the selected date and time, the access will automatically be removed again.
- Click the
- When your Grant is ready, click
Publish. - When a CLI is running against the Data Source you picked, your new (or updated) Grant will automatically be create/updated in the Data Source.